Liposuction Recovery: Timeline, Stages and Practical Healing Tips

Key Takeaways
- Anticipate a multi-phase healing starting with swelling, numbness and bruising and advancing months, with speed determined by treated region size and fat volume extracted. Follow each stage’s guidelines for best results and attend follow-up visits.
- We recommend compression garments, pain management and gentle walking early on to control swelling, reduce risk of clots and support healing, transitioning activity levels only when cleared by your surgeon.
- Stock a recovery kit with correctly fitting compression wear, pain medications, wound-care products, hydration and an at-home arrangement that reduces stress on your body and provides convenient access to essentials.
- Back tissue healing with protein-dense, nutrient-rich meals and regular hydration, skip processed foods and sugars, and maintain healthy habits to shield long-term results.
- Be on the lookout for any red flags including escalating swelling, intense pain, fever, abnormal discharge, persistent redness, warmth or foul odor and pursue immediate medical care if any present.
- Anticipate emotional swings, set reasonable expectations, take care of yourself, acknowledge victories, no matter how small, and recruit family or friends to cheer you on through recovery.
The liposuction healing process is the path your body takes following fat removal surgery. This covers the immediate recovery, swelling, pain management and skin retraction over time (weeks to months).
Technique, treated area, patient health, and related factors influence timing and comfort. Set clear expectations on activity restrictions, dressings and follow-up to help guide the healing process and results.
The following sections detail timelines, tips and common problems.
The Healing Timeline
Liposuction recovery unfolds in a somewhat predictable time sequence. Knowing what to anticipate at every stage helps inform reasonable expectations for work, activity, and self-care. The timeline below details typical marks, why they’re important and actionable steps to promote healing.
1. Immediate Aftermath
Anticipate swelling, bruising and numbness of the treated area post surgery. Swelling and bruising typically reach their maximum extent during the first week, with moderate to severe pain being most intense for approximately five days and then subsiding to a mild soreness.
Keep the surgical site covered and heed all initial post-op instructions to the letter from your surgeon to minimize infection and bleeding risk. Start wearing compression garments as instructed to manage swelling and bleeding, which encourage the skin to stick to its new contour and can help minimize fluid accumulation.
Restrict activity and rest during the initial 48 hours, but light ankle pumps or bedside leg lifts reduce clot danger. If there is unusual discharge, fever, or severe increasing pain, notify the clinic immediately.
2. First Week
Keep wearing your compression garments 24/7 as directed – most patients experience maximum swelling and bruising around day three to five and slow improvement by day seven or eight. Control aches and soreness with recommended medications or basic OTCs when okay’d by your provider.
Begin easy walking as soon you’re able to encourage circulation and prevent blood clots — brief walks, repeated often, are preferable to one lengthy stint. Keep an eye on incision sites for infection or unexpected discharge, and maintain clean and dry dressings.
3. Weeks 2-4
Step up to light activity while still eschewing hard exercise. Keep compression on unless directed otherwise–the majority wear through week 5 or 6 with surgeon clearance.
You’ll see swelling and bruising subside as inflammation calms down, though mild soreness can linger for 3–6 weeks. You can resume showering but not baths or swimming until incisions are fully healed in order to reduce infection risk.
A lot of patients are happy to resume desk work by two weeks post-op if responsibilities are not physically taxing.
4. Month 2-3
Wean off compression garments if your surgeon gives the all clear – swelling should be minimal by this point. Reintroduce more vigorous activity and exercise slowly, observing for pain or asymmetric swelling.
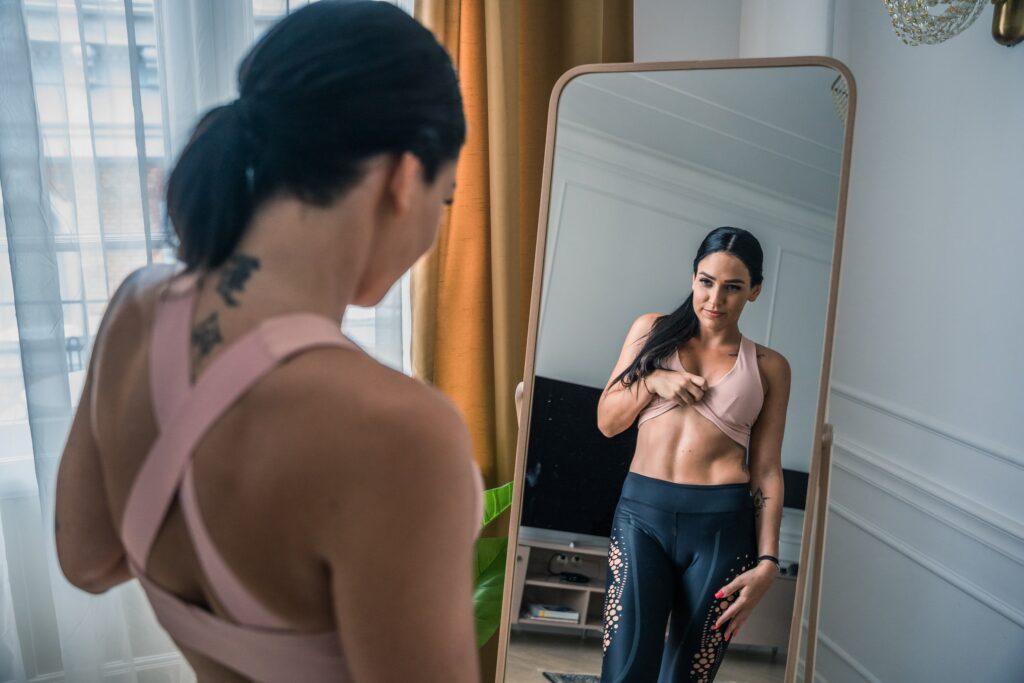
Experience ongoing refinement in body shape and some skin contraction, although the inflammation can persist for 12 months or longer. Stay healthy — eat right and exercise to fuel continued healing and preserve results.
5. Long-Term
Focus on weight management — to maintain liposuction results and to prevent significant weight fluctuations. Go for a well-rounded lifestyle change.
Watch for scars and skin changes, apply suggested scar care products and sun protection. Plan for follow-up visits as necessary, final result often present 6 months to a year out.
Technique and Recovery
Various liposuction methods contour both the acute healing requirements and long-term recuperation schedule. Procedures like tumescent, ultrasound-assisted (UAL), laser-assisted (LAL), and power-assisted (PAL) liposuction all fragment and aspirate fat in unique ways, and impact tissue trauma, bleeding risk, and swelling in varied manners.
Tumescent techniques utilize large volumes of fluid with local anesthetic and generally induce less blood loss, therefore pain might be less and swelling more controllable. UAL and LAL utilize energy to assist in fat disruption, which can translate to increased heat-driven inflammation and an increased risk of surface irregularities, necessitating more diligent follow-up. PAL employs rapid cannula motion to accelerate fat removal, which helps reduce surgeon fatigue, but can still result in moderate bruising and soreness.
Bigger treatment areas have a longer healing time. Multi-zone or large-volume lipo will often push beyond this recovery window. A small flank-only operation might permit a return to light work in 2 or 3 days and normal work in a few weeks.
Full abdominal and flank treatment typically equates to more swelling, larger fluid shifts, and a recovery that aligns more with the 4 – 6 week rule of thumb. Surgeons sometimes stage large-volume cases across two sessions in order to reduce complication risk and minimize the single-session recovery burden.
Adhere to technique-specific aftercare precisely as your surgeon directs. General precautions include compression garments for a few weeks to assist with swelling and pain control, particular drain/dressing care when present, and bathing and incision instructions to minimize infection risk.
Activity guidance is precise: short, leisurely walks inside the house are encouraged during the first week to promote blood flow, while longer walks and aerobic exercise are delayed until cleared, usually several weeks. Pain management might include oral medications and cold compresses, redness, or fever immediately.
Recovery expectations by technique
| Technique | Typical early issues | Time to resume normal activities |
|---|---|---|
| Tumescent | Mild–moderate swelling, bruising, burning soreness | 1–3 weeks light activity; 4–6 weeks fuller activity |
| UAL / LAL | More inflammation, possible heat-related tenderness | 2–4 weeks light activity; 6+ weeks for full activity |
| PAL | Moderate bruising and soreness, quicker fat removal | 1–3 weeks light activity; 4–6 weeks fuller activity |
Common healing features apply across techniques: swelling, bruising, and discomfort often peak in the first week and improve by days seven to eight. Seromas can develop and require drainage.
Pain can sting or ache deep. Final deflation and complete aesthetic results can take weeks to months. Follow-up visits allow your surgeon to catch seromas, remove sutures or drains, and tweak the plan so healing remains on track.
Your Recovery Toolkit
Defined supplies, a thought-out home plan, and trustworthy support contribute to making the three phases of recovery—initial recovery, sub-acute healing, and long-term recovery—more manageable. Here are the tools and strategies to collect and employ, along with samples and scheduling to align with typical post-op advice.
Compression Garments
Wear compression garments according to directions to limit swelling and contour tissues. Surgeons typically recommend 2–6 weeks of consistent use. A good fit fits close without pinching – select pieces sized by your surgeon or a professional fitter.
Wash clothing every couple of days on a mild cycle and air dry to keep skin healthy and prevent irritation. Follow a wearing schedule: for example, full-time for the first two weeks except for brief showers, then daytime use only for weeks three to six.
Monitor comfort and swelling via daily photos and quick journaling—record pain, numbness, how clothing fits at various times of day. Think about incorporating lymphatic massage beginning within the first week to assist with moving fluid and contour — see a trained therapist or learn gentle self-massage.
Pain Management
Take your pain meds as directed to keep you working, not just to take out every twinge. Standard schedules address the initial days more aggressively, then decrease according to daily pain. Maintain an easy to consult log of dose and time to prevent missed or double dosing.
Cold packs can be used when authorized to minimize swelling and pain—20 minutes on, 40 off—over a thin cloth. Look out for spreading pain, fever or redness—these can indicate infection or other complications. Sleep and no heavy lifting to keep the pain spikes down.
Quality sleep, generally 7–9 hours a night, facilitates recovery and lowers pain sensitivity.
Gentle Movement
Start light walking as soon as possible after surgery to increase circulation and reduce the risk of blood clots. Short walks a few times a day is best. No running, heavy lifting or high-impact workouts for a minimum of one month, but you desk jockeys and non-strenuous workers can usually get back to work within the first week if comfortable.
Stretch gently to maintain flexibility — hold for short periods and cease stretches if you feel pulling near incisions. Set small goals: a five-minute walk three times a day in week one, then increase pace and distance week by week in line with your surgeon’s advice.
Scar Care
Carefully clean incision sites with mild soap and water and keep them dry as directed – no soaking until cleared. Use recommended ointment or silicone sheets to reduce scar thickness and pigment – initiate silicone as soon as wounds are closed.
Guard scars against sun exposure as it will cause them to darken – apply broad spectrum sunscreen or cover with clothing for a few months. Monitor scar changes with pictures every month and adjust care if scars thicken or discolor.
Fueling Your Body
Healthy eating and hydration are the foundation of an easy liposuction recovery. Consuming the right foods provides the repair materials, keeps inflammation down and maintains energy as the body heals. Hydration promotes circulation, aids in the elimination of waste and excess fluid, and maintains supple skin as the tissues subside.
A balanced diet provides the daily mix of vitamins and minerals required for cell repair, although targeted supplements can assist if tests or a clinician indicate deficiencies. Fuel your body with protein rich foods. Protein gives you amino acids to rebuild connective tissue and to make immune proteins that combat infection.
Target protein at every meal and within 2 hours of light exercise whenever possible. Fuel with protein + collagen-boosting vitamin C-rich foods! Mix lean meats with beans, or fish with bell peppers and a salad of broccoli.
Include these high-protein, nutrient-rich foods in each meal:
- Lean chicken, fish or lean beef/pork.
- Eggs and low-fat dairy like yogurt, cottage cheese, or kefir.
- Plant proteins: lentils, chickpeas, black beans, tofu, tempeh, edamame.
- Nuts and seeds: almonds, walnuts, chia seeds, pumpkin seeds.
- Protein-rich grains: quinoa, farro, and buckwheat.
- Protein powders when whole foods are limited: whey, pea, or soy options.
Drink copious amounts of water, too. A good rule of thumb is half your body weight in ounces of water per day – for a 70 kg person that amounts to about 1,150–1,200ml more than basic thirst signals equate, so distribute consumption throughout the day.
Good hydration will flush out toxins, reduce swelling and keep skin supple and elastic – key as skin settles post liposuction. Add in herbal teas and broths for variety, but skip extra caffeine and alcohol — they’ll dehydrate and mess with your sleep.
Steer clear of processed foods and refined sugars to set yourself up for maximum healing. They can promote inflammation, delay recovery, and cause blood sugar swings that impact the immune system. Choose whole-food alternatives: whole grains instead of white bread, fruit instead of candy, and home-cooked meals instead of fast food.
A colorful variety of frozen or fresh fruits and veggies provide antioxidants, vitamins and minerals – think: berries, kiwi, papaya, bell peppers, broccoli and brussel sprouts for robust vitamin C backing.
Putting on muscle mass with light strength training, as approved by your surgeon, helps to optimize your body composition post recovery. Hydration and a balanced diet in tandem reduce complication risk and get you back to normal activity with more resilience.
The Mental Journey
Recovery from liposuction is more than physical, it’s a mental journey that parallels wound healing and swelling reduction. Anticipate mood swings, anxiety, and reprieves. Recognize what can arise, why, and how to manage it so the mind stays up with the body.
Brace yourself for mood swings as your body repairs and transitions. Hormonal shifts, aches, sleep deprivation, and changes in appearance all impact your mood. Study discovers that almost a third of patients experience surprising emotional highs and lows post-surgery. That can signify sudden depression the day after an effective check-in, or a surge of euphoria that immediately turns to skepticism.
These mood swings are inevitable and typically subside as the pain diminishes, swelling decreases, and normalcy returns. Lower your expectations about the recovery time and the outcome. Swelling can mask definitive contours for weeks to months. Some experience self-esteem gains quickly, but true emotional settling is slow.
Approximately 70% have increased self-esteem post-liposuction, but the emotional recovery trajectory is personal. It often takes weeks before patients begin to feel steady, and some require as long as three months to fully recover emotionally. Expect incremental progress and don’t evaluate early pictures or stats.
Practical self-care sustains mental health and accelerates emotional healing. Adhere to post-op sleep, diet and hydration guidance—7–9 hours of quality sleep nightly does wonders for mood and healing. A balanced diet with protein, fiber and fluids provides sustained energy and helps control inflammation.
Maintain motion light but consistent, as light walks elevate mood. Employ breathing and relaxation techniques to calm anxiety.
- Examples of self-care activities that benefit emotional well-being:
- Brief daily walks outside to improve mood and eliminate rumination.
- 5 to 10 minutes of deep breathing, twice a day.
- Led mindfulness or meditation sessions, 10–20 mins.
- Light tai chi or stretching to decrease tension and increase calm.
- Consistent sleep schedule targeting 7-9 hours per night.
- Straightforward meals with lean protein, vegetables and consistent liquids.
- Quick journaling of progress and sentiment, thrice weekly.
- Planned check-ins with a close friend or family member.
Reward the little victories to keep your spirits up as you heal. Highlight pain-free days, reduced swelling, or first fitting into a favorite piece of clothing. Celebrate successes with your support system.
Whether it’s friends and family or a therapist you enlist, having people in your corner eliminates the isolation and can help catch stubborn depression. As many as 30% of patients can have depression. Early assistance matters. If the anxiety or low mood lingers, contact a professional.
Red Flags
Red flags post-liposuction are indicators that the regular healing trajectory has been derailed and you require intervention. Be on the lookout for increasing swelling, pain, wound redness and overall ill feeling. Record where and when each shift began, what it feels like, and any activities you performed that day — like heavy lifting or travel — so you can provide specific information to your clinician.
Look out for excessive swelling, intolerable pain, fever, or abnormal incision discharge. Mild swelling and discomfort should occur for days to weeks, but a sudden spike in swelling or pain after the first week can indicate an issue. A fever above 38 degrees, pus or thick yellow-green fluid draining from an incision, or incisions that gape open are red flags for infection and require immediate evaluation.
Try to keep photos on your phone with dates so you can monitor your progression. Move fast if you observe ongoing redness, warmth or foul odor at the surgical site. Local heat and spreading redness beyond the treated area may indicate a deep or spreading infection. Where there’s a stinking smell, it usually signifies that bacteria have hitched a ride.
If the skin becomes tight and quite sore in one area, that too can indicate an abscess. Prompt antibiotic treatment and drainage are typical; delays increase risk of spread to other tissues. One of the red flags for a bad surgery is the appearance of unnatural shapes or unevenness. Lumps, dents, ridges or one side looking different than the other are indicators of uneven fat extraction, or of an uneven collection of fluids.
These can be treated with small revision, massage, or additional surgery, but prompt evaluation aids options before scar tissue settles in. Be alert for signs of blood clot or deep vein thrombosis (DVT): swelling that is sudden or worse on one leg, warmth, redness, or unexplained shortness of breath. DVT is less common, but more serious – it can lead to pulmonary embolism.
Inform your doctor of travel, family clotting history or hormone use — all of which increase risk. Post all red flags at home and on your phone so your household members can intervene if you can’t. Such as fever, green or bloody drainage, new or increasing pain, suddenly appearing asymmetry, excessive or persistent bruising and SOB.
Show this list to your parent. Record any worsening of your condition to assist early detection of complications. Jot down dates, times, symptoms, medication taken and home care steps attempted. Bring this log and photos to follow-up visits; it makes diagnosis clearer and accelerates decision-making.
Conclusion
Liposuction healing follows distinct phases. Swelling diminishes week by week. Bruises dissipate and skin tightens over the course of months. Rest, easy strolls, and protein-packed meals accelerate tissue healing. Gentle massage and compression help sculpt results and reduce swelling. Watch for pain, fever or strange redness and ring up a provider if they show up. Prevent scars from the sun and allow wounds to close. Anticipate solid results at 3 months and final changes at 6-12 months.
Choose a provider you trust and stick to their plan. If you want a quick checklist or sample first two weeks meal and activity plan, request and I’ll post one.
Frequently Asked Questions
How long does initial swelling last after liposuction?
Most takes about 2–4 weeks to resolve. Mild swelling can remain for 3–6 months, and final contour may take up to 12 months. Adhere to your surgeon’s aftercare to accelerate recovery and enhance results.
When can I return to work and normal activities?
Light desk work can usually be done in 3–7 days. Don’t exercise intensely or lift anything heavy for 4–6 weeks. Your surgeon will clear you according to healing and procedure extent.
What pain level should I expect and how is it managed?
Pain is typically mild to moderate and resolves during the first week. Physicians will write prescriptions for short-term pain meds and suggest compression garments, rest and cold packs for padding and expedited healing.
Do I need to wear a compression garment, and for how long?
Yes. Compression garments minimize swelling and aid in healing. Wear them day and night for 4 – 6 weeks or as directed by your surgeon to help contour and reduce complications.
Will liposuction scars be visible?
Scars are tiny, 2 – 4 mm, and placed in hidden locations. They tend to fade over months but can stay a bit visible. Follow scar-care instructions to reduce appearance.
How should I eat to support healing after liposuction?
Maintain a healthy, protein-rich diet with ample vegetables, fruits, and fluids. Steer clear of too much salt and alcohol to minimize swelling. The right nutrients feed tissue repair and speed healing.
What warning signs require immediate medical attention?
Get treatment for intense pain, excessive bleeding, fever higher than 38C, spreading redness, smelly discharge, or acute breathlessness. These signs could suggest infection or a serious complication.